
Jul
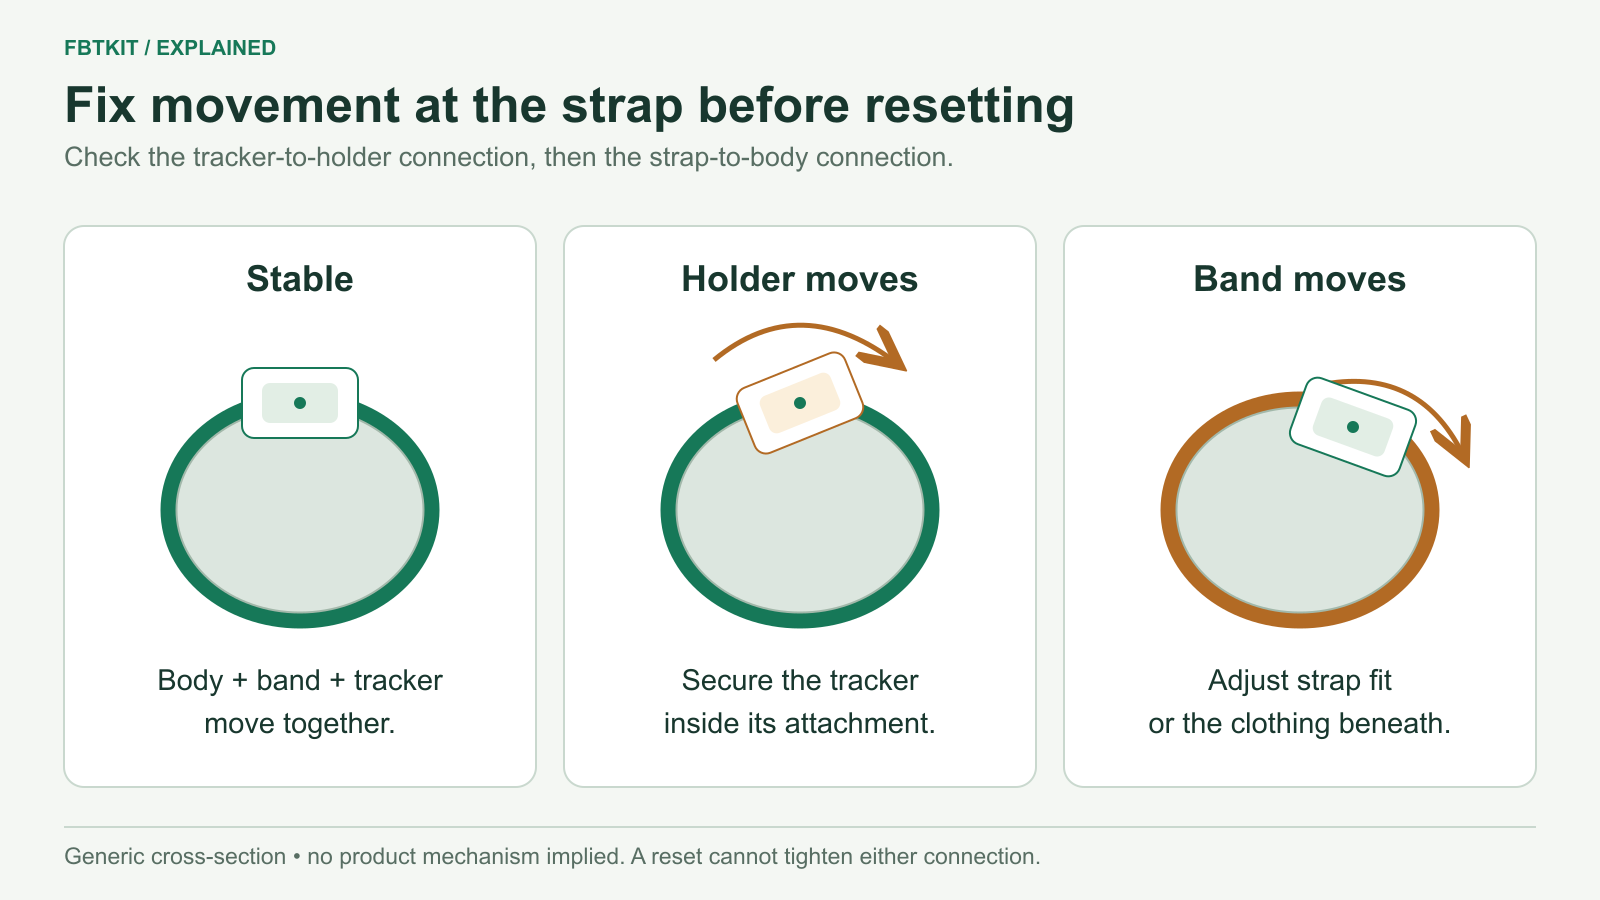
A good VR tracker strap keeps the sensor in the same position and direction as you move, without pinching or restricting you. Choose one that fits the exact tracker attachment and your body measurement, then test both the holder and the band. A tight band will not fix a tracker that rotates inside its holder.
This guide covers buying, fitting, clothing and slip problems for straps used with SlimeVR-compatible trackers. For the body-role map, use where to place each tracker.
Before buying: check the attachment and usable size
- Match the mount. Compare the tracker’s actual loops, clip, holder or threaded attachment with the strap. A strap sold for a VIVE Tracker is not automatically compatible with a SlimeVR-style enclosure.
- Measure where you will wear it. Measure around the intended body area over the clothing you normally use. Compare that with the seller’s usable adjustment range, including the overlap needed for the closure.
- Check width as well as length. The band must fit the enclosure or adapter. A wider strap cannot help if you have to fold it through a narrow slot.
- Leave room to adjust. Avoid a fit that depends on stretching the band to its limit or fastening only the very tip of the closure.
- Check access and pressure. The holder should leave the necessary controls accessible and should not put a buckle or hard edge directly under a pressure point.
SlimeVR’s DIY kit guide shows why case design matters: its official main and extension cases use different strap widths. Those dimensions belong to those cases; they are not a size specification for FBTKit.
Fit the strap before calibrating
- Choose the clothing you will actually wear in VR. Empty any pocket beneath the strap and smooth out folds.
- Seat the tracker fully in its holder. Check that the enclosure does not rotate independently when you gently move it by hand.
- Place the band flat around the assigned body area. Keep the closure engaged across its usable fastening surface.
- Start with light, even tension. Bend the nearby joint and check that the holder does not dig into you.
- Walk a few steps, turn, bend gently and sit if that is part of the session. Compare the tracker’s angle and the band’s position before and after.
- Adjust the one mount that moved, then repeat the movement that caused the shift.
Stop tightening once the tracker stays stable and the fit is comfortable. Remove or loosen a strap that causes pain, numbness or tingling. SlimeVR’s safety guidance warns against overtightening; squeezing harder is not a remedy for a poorly fitting holder.
Find which layer is slipping
| What you can see | What to change first |
|---|---|
| The band stays put, but the tracker rotates or lifts inside the holder. | Reseat the tracker and check the attachment matches the enclosure. Replace a damaged or incompatible holder. |
| The tracker and band rotate together around the limb. | Smooth the band, check closure overlap and make a small fit adjustment. Retest without changing software. |
| The clothing moves with the band or gathers underneath it. | Use a flatter, closer-fitting layer or another comfortable contact position within the same assigned body area. |
| A buckle or seam hurts before the tracker becomes stable. | Move the pressure point or choose a different suitable strap. Do not keep adding tension. |
| The physical tracker stays fixed, but the virtual limb points the wrong way. | Check body-role assignment, mounting direction and calibration. |
SlimeVR’s strap components guide discusses band width, flexibility and grip as possible contributors to sliding. Treat those as selection factors, not a guarantee that one material will fit everyone. Avoid improvised adhesive modifications to an unknown strap coating.
What changes when you wear trackers over clothes?
The tracker should follow your body, not a loose garment. Watch the fabric under the band while you bend or turn. If the fabric shifts first, calibrating again will not stop that movement.
SlimeVR’s wearing guide recommends direct skin contact for stability, while allowing comfortable positions within the designated body area. If you prefer a clothing layer, choose the exact outfit first and test the completed fit. Avoid placing the holder over a pocket, thick seam or folded waistband.
Keep the assigned location intact when adjusting for comfort. Hip is at the pelvis or belt area; Waist is above it, near the navel. Moving between them requires a software role change. Rotating a tracker around its assigned body part also requires the mounting direction to match.
For feet, check the setup you will actually use, including socks or shoes. Place the sensor on top of the foot with the documented orientation, then gently lift and return the foot. Do not put the enclosure under the sole to make the strap feel tighter.
When to replace a strap
Inspect the closure, stitching, elastic and tracker mount before use. Replace the affected part if stitching is separating, a mount is cracked, or the fastening repeatedly opens during ordinary movement after a correct fit. A software reset cannot repair those failures.
There is no useful universal replacement date. A strap that looks old may still hold securely; one that looks new can have a damaged mount. If a structurally intact closure is clogged with lint, follow its care instructions and retest after it is dry. See the cleaning and storage routine for handling the set after use.
What the FBTKit listing includes
The FBTKit product listing describes anti-slip straps and lists two 80 cm, two 50 cm and two 30 cm straps. That is a generic package description: it does not independently confirm the strap quantities supplied with each 5-, 6-, 8- or 10-tracker option, or each strap’s usable fit range. Confirm those details for your selected kit before ordering. The listed lengths are not a universal body-size chart.
Once the physical fit is stable, complete the SlimeVR calibration routine. Recheck the fit after warming up or changing clothes, especially if a previously stable tracker starts moving. During a longer session, pause to check pressure and comfort as well as position; loosen or remove a painful strap instead of tightening through it.
Sources and product description checked September 29, 2026. These are fitting instructions and observations to make with your own setup, not reported FBTKit wear-test results.
