
Jul
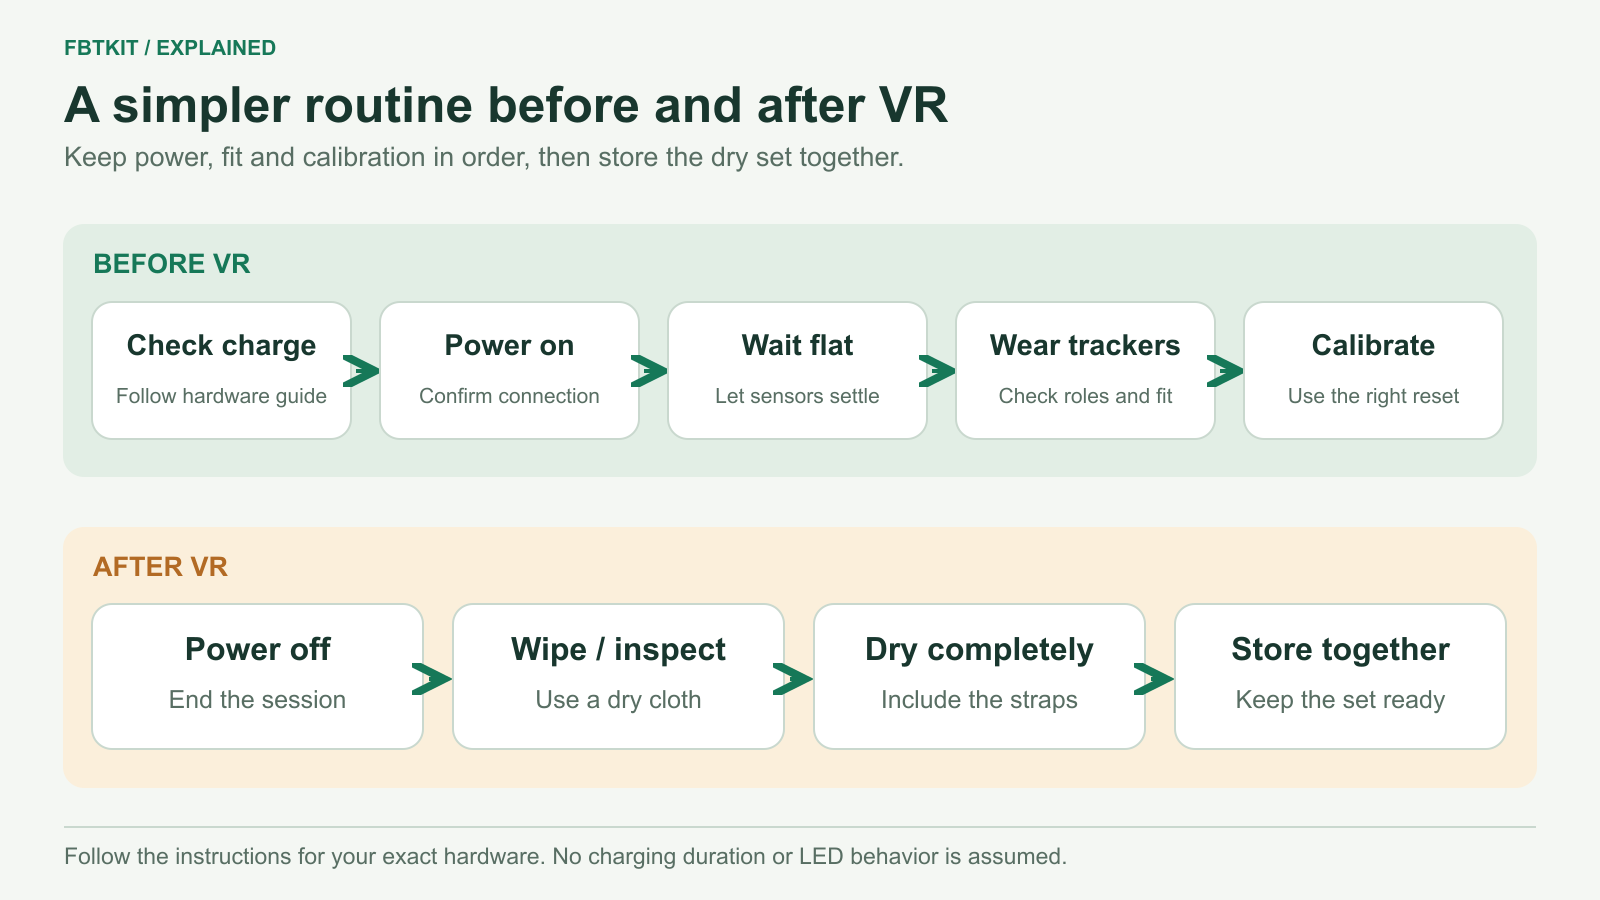
Keep full body trackers ready by checking each powered unit, letting the startup calibration finish before wearing them, and putting the complete dry set away after use. Charge and clean according to the instructions for your exact hardware. A familiar connector or light color does not establish the correct method for another tracker model.
A tray with a place for each tracker and strap is enough to make missing pieces obvious. Label devices so you can return them to their usual body roles, and keep the appropriate cables together.
Charge the powered units, not an assumed sensor count
Lay out the rechargeable devices and check each one’s status using its documented indicator or software display. In some SlimeVR configurations, an extension sensor takes power from a main tracker and has no battery of its own. The SlimeVR hardware overview explains that distinction. Do not assume the number of body sensors equals the number of charging ports.
- Inspect the charging cable and connector before plugging in. Set aside a damaged cable or a device with a damaged port.
- Use the cable, adapter and charging conditions specified for your exact tracker. Follow its instructions for whether it must be switched off.
- Place the devices where you can observe them, with no fabric piled over them and no charging leads crossing the play area.
- Check every unit for the completion indication described by its maker. A cable being attached does not prove that device charged.
- Disconnect and put the leads away before wearing the kit.
Official SlimeVR safety instructions specify charging rules for official SlimeVR hardware, including attended charging. Their voltage, temperature and indicator details should not be copied into instructions for FBTKit or another third-party build.
If a tracker becomes unusually hot, swollen or damaged, stop using and charging it and follow its maker’s support instructions. The U.S. Fire Administration also identifies excess heat and shape changes as reasons to stop using a lithium-ion battery. Do not open it or test it again just to finish a planned session.
Keep a known data-capable USB cable separate from any charge-only leads. A cable that charges a tracker may not carry the USB data needed during setup; SlimeVR lists this distinction in its USB connection troubleshooting. Label the cables after checking their documented capability so you can find the correct one later.
FBTKit charging accessories: what is confirmed?
The current FBTKit listing includes a power adapter and a 1-to-6 charging cable in its generic package description. It does not separately establish the cable quantity or charging arrangement for each 8- or 10-tracker option. Confirm the parts and instructions supplied with your selected kit before planning a charging station.
This guide does not assign a meaning to FBTKit light colors or prescribe a charge time, charger rating or battery-storage percentage. Keep the instructions supplied with the devices beside the charging area so those details are available when you need them.
A short checklist before putting on the headset
- Count the set. Check the trackers, straps, headset and controllers you intend to use. Look for an item left drying or charging elsewhere.
- Power on and connect. Open SlimeVR Server and confirm the expected devices appear. If one is absent, use the tracker detection guide.
- Allow startup calibration. SlimeVR’s prebuilt tracker setup calls for powered-on trackers to remain still on a flat surface while startup calibration completes. Follow the device and server prompts before picking them up.
- Wear and check fit. Put each device on its assigned body area. Smooth folded fabric and confirm the holders are secure; use the strap fitting guide if a mount slips.
- Look around the room. Clear loose cables and objects from the space you will move through, and check the headset’s current boundary.
- Calibrate and try a few movements. Complete the daily calibration routine and check your chosen avatar before joining a group.
After use: clean without guessing the material
Turn the devices off and disconnect charging leads. Remove loose surface dust from the enclosure with a soft, dry cloth, keeping debris away from the ports. Do not spray a tracker or immerse the electronics.
For straps, first inspect the label or supplier’s care instructions. Detach electronics before any cleaning method that uses water. Use a wet or machine-wash method only if it is approved for that strap; coated elastic, padding, stitching and hook-and-loop fasteners can have different requirements. An unknown material is not a reason to try alcohol, bleach or a strong household cleaner.
No FBTKit-specific strap wash method is confirmed by the current product description. If a dry surface clean is insufficient, obtain the strap’s care instructions before proceeding. Check fastening surfaces for lint and inspect stitching or mounts while the set is off your body.
Dry first, then store the complete set
Keep damp straps outside the closed carrying bag until fully dry by their approved drying method. Avoid a heater, tumble dryer or direct sun unless the maker specifically permits that method. Do not seal damp fabric against the electronics.
Once dry, return each device and strap to its usual place. Coil leads loosely and avoid packing them under a heavy item or folding them tightly at a connector. Store the kit away from heat and moisture. If you will leave it unused for a long period, follow the battery-storage instructions for that model rather than assuming it should stay plugged in.
Set a damaged strap, failed cable or uncertain tracker apart from the ready kit. Before the next session, deal with that particular item instead of rediscovering it after you have put everything on.
Product description and SlimeVR documentation checked September 29, 2026. No FBTKit charging, battery-runtime or strap-washing test is reported.
