
Jul
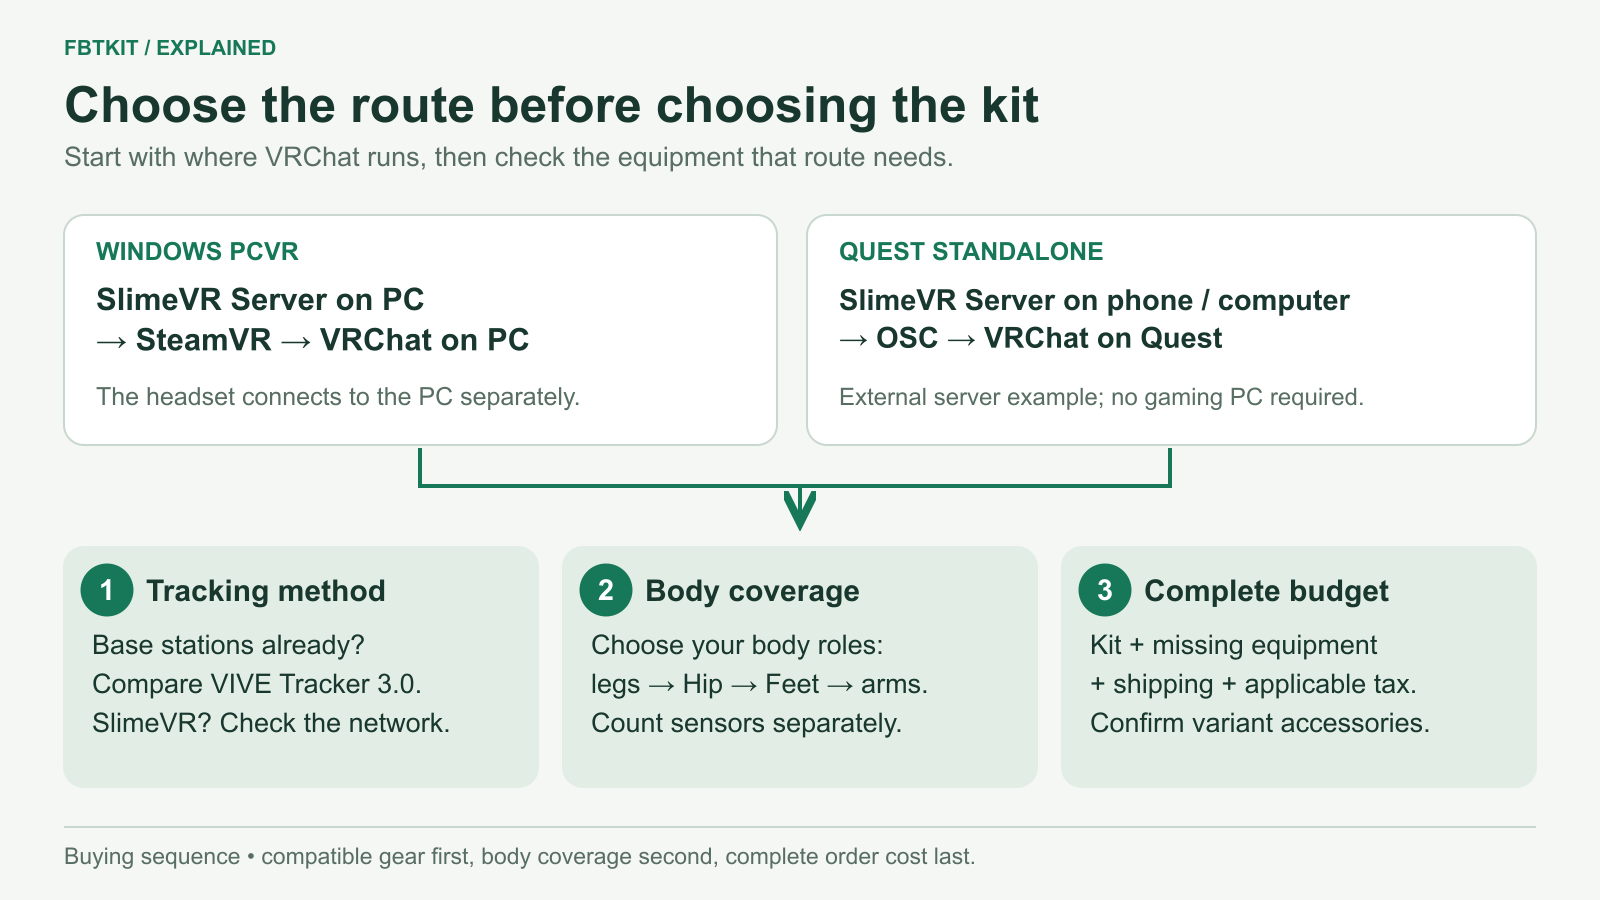
Choose a full body tracking kit in this order: where your VR app runs, which tracking system fits your existing equipment, which body movements you want to measure, then the complete purchase cost. For a SlimeVR setup, six sensors are a useful starting point for legs and a separately measured hip; consider eight for foot orientation or ten for upper-arm movement. Confirm the software route before choosing a bundle.
This guide helps you make that purchase decision for VRChat and similar social VR use. It is based on current software documentation and product listings. We have not tested FBTKit hardware or compared its tracking performance in a controlled session.
Start with where VRChat runs
A Quest headset can run VRChat itself or display VRChat running on a gaming PC. Those are different setups. The name on the headset does not answer which software must receive your tracker data.
| Your setup | A SlimeVR path to consider | What to confirm before buying |
|---|---|---|
| VRChat on a Windows gaming PC | Trackers → SlimeVR Server on the PC → SteamVR → VRChat | The PC already runs your headset and VRChat successfully. Your network lets the trackers reach the server. |
| VRChat running directly on Quest | Trackers → SlimeVR Server on a PC or supported Android device → OSC → VRChat on Quest | A device can keep the server running, and the headset can receive its OSC data over the local network. |
| Another game or creation app | Use the output that the receiving app actually accepts. | Check both the app’s tracker support and the documented SlimeVR integration. Headset compatibility alone is insufficient. |
SlimeVR documents both SteamVR setup and standalone VRChat over OSC. Its mobile guide recommends a phone or PC over running the server directly on Quest. A PC that only hosts the server for standalone VRChat does not also have to render PCVR.
For the detailed platform choice, use the Quest 2 and Quest 3 guide. For an app other than VRChat, start with SlimeVR’s current compatibility list and the app’s own documentation.
Choose a tracking system that fits your room and equipment
If you already use SteamVR base stations, include a VIVE Tracker 3.0 setup in your comparison. Existing compatible infrastructure changes the purchase: you may be adding trackers and mounts rather than building a tracking room from scratch. VIVE Tracker 3.0 requires base stations; HTC lists its included receiver accessories and requirements.
If you want to avoid base stations, a SlimeVR-compatible IMU kit is another option. The current FBTKit model uses a local Wi-Fi setup. You still need server software, role assignments, secure mounting and calibration. “No base stations” tells you about room hardware; it does not remove those setup steps.
Think about your actual room: can you position the infrastructure your chosen system needs, reach the computer’s ports, charge the devices, and move without pulling or disturbing the mounts? If you move between rooms, consider what you would need to move and set up again.
The SlimeVR versus VIVE Tracker 3.0 comparison explains the tradeoffs. VIVE Ultimate Tracker is a different product; do not apply Tracker 3.0’s requirements to it.
Choose a kit by the movement you care about
For SlimeVR, the useful question is which extra body measurement you want. More devices are worthwhile when they capture something you will use.
- A smaller first purchase: look at the five-sensor layout and accept that it has no separate Hip, Foot or Upper Arm sensors.
- Legs plus pelvis movement: consider six, which adds Hip.
- Deliberate foot poses: consider eight, which adds a sensor on each foot.
- Elbow placement and arm gestures: consider ten, which also adds sensors above the elbows.
These are the documented SlimeVR layouts, not claims that a particular FBTKit option is preassigned. The 5/6/8/10 sensor guide shows the full body map and explains why sensors, wireless units and application tracking points are different counts.
For example, a buyer who wants expressive foot poses but has little interest in elbow control has a reason to examine eight before ten. Someone exploring FBT for the first time can choose a smaller kit and learn what they actually use. Neither decision requires assuming that the highest count has the best value.
Price the setup you will actually receive
Open the selected product variant and check the number of devices, straps or mounts, charging equipment and any receivers it needs. A kit photo may show accessories without explaining how many come with each option.
For FBTKit, the listing has four tracker-count options and one shared accessory list. That list does not separately confirm the strap and charging-cable quantities for the eight- and ten-tracker variants. The price and kit-contents guide identifies the published details and the remaining package questions. Add shipping, applicable tax and any missing equipment before comparing totals.
Decide whether the routine fits your sessions
Read the Windows installation guide before ordering if you are new to SlimeVR. You will need to connect the hardware, assign body roles and complete setup. On later sessions you still have devices to charge, straps to wear and tracking to check.
That work may be worthwhile if body movement is central to your usual VRChat sessions. If you mainly join short conversations and already avoid extra setup, waiting is a reasonable choice. Skip full body tracking for now if your main app does not use the additional input or the complete purchase would displace equipment you need more. You can keep using a headset and controllers while deciding whether FBT solves something you notice regularly.
Before payment, make sure the seller’s help and return terms cover the questions that matter to you: hardware faults, missing accessories and initial connection problems. Community software documentation explains SlimeVR, but it does not establish a seller’s warranty or promise support for its particular hardware.
Buying for someone else?
Ask where the recipient runs VRChat, which headset and computer they use, whether they already own trackers or base stations, and whether they want to wear and configure extra equipment. The headset model alone cannot choose the right kit. If those answers are unavailable, let them choose the setup with you before ordering.
For a birthday or holiday, confirm the selected option’s availability and destination-specific delivery estimate. Do not assume a general shipping claim guarantees arrival by the occasion. A supported setup they want is a better gift than a larger surprise bundle they cannot use.
Your next decision
If your software route is settled, choose your sensor coverage. If the total is too high, use the budget guide to decide what can be omitted or reused. When both fit, compare the selected FBTKit option with other complete offers, using the same body coverage and required accessories.
